How to modify styles using css in a Google Form
"being able to have two or more fields on the same line to save space"- Google Docs Editors Community
You have been asked to make a form match your organization's design, and the theme options in Google Forms only go so far. You can change the header image, the colors and the fonts, but the questions stay in one column, and the title bar and spacing stay as Google set them. Embedding the form on your website doesn't help, because your site's CSS can't reach inside the iframe. With Formfacade, you can switch the form to two columns, set its colors and add your own CSS for the rest.
Below are three ways to change how a Google Form looks, and where each one falls short.
The need:
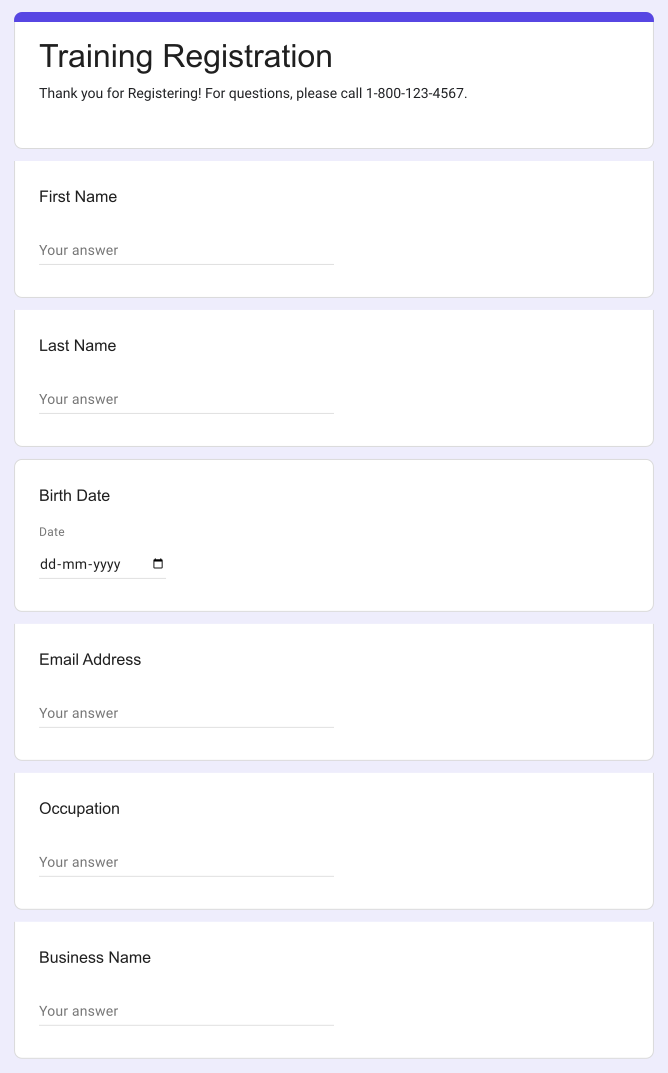
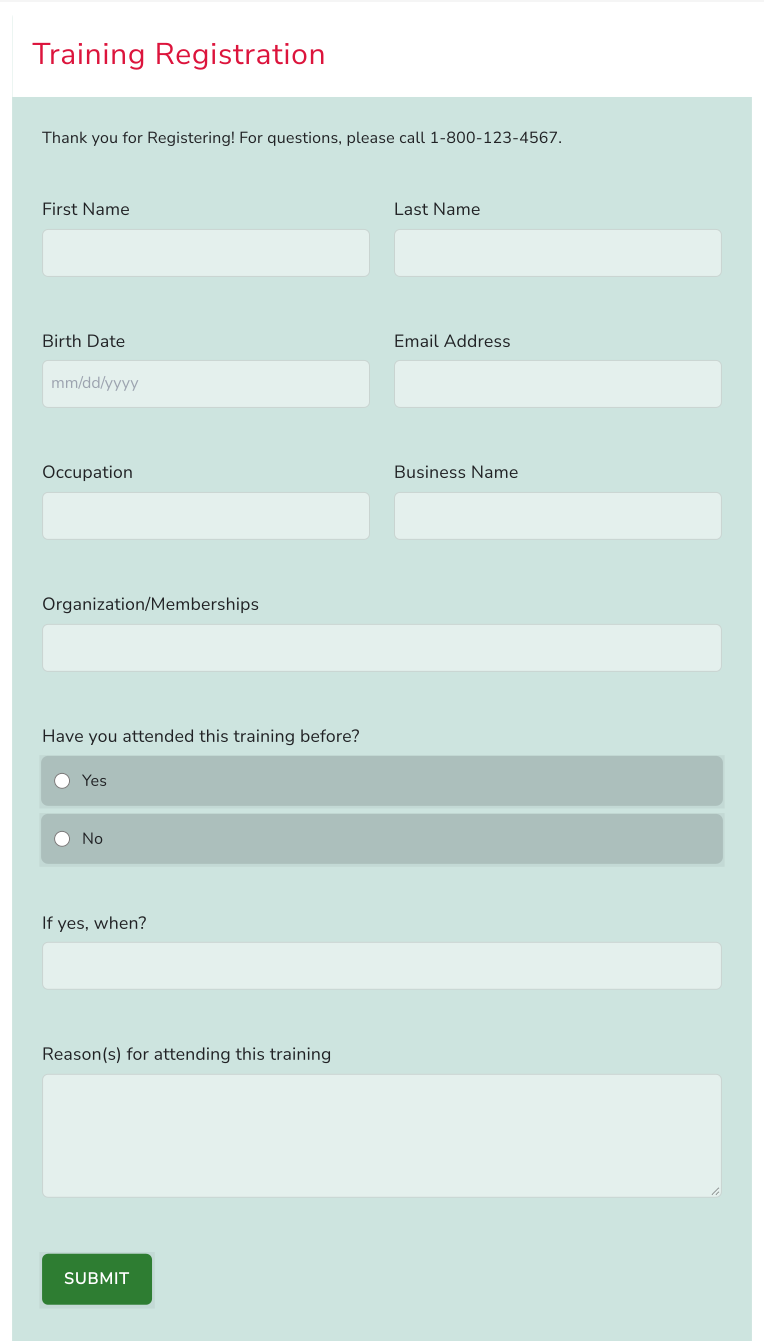
In the time of COVID-19 crisis, Centre of Small & Medium Enterprises are hosting regular training programs online to make SMEs prepare themselves and their employees for the safety measures when they reopen businesses. The center, envisioned to create neat and simple training registration form like this.

1. Customize the theme in Google Forms
Google Forms lets you choose a header image, a theme color, a background color and fonts. Where it falls short: the questions stay in one column, and you can't change the title bar, the spacing or the button by itself. If you embed the form on your website, your site's CSS can't reach inside the iframe.
2. Build your own HTML form
Write an HTML form on your website that sends each answer to your Google Form, using the entry ID of each question.
Where it falls short: you have to find every entry ID, update the code whenever the form changes, and handle errors yourself.
3. Use Formfacade and your own CSS
Formfacade helps them to design this above Google Form look like what they envisioned.
I will walk you through the transformation of the form - with a detailed step-by-step guide. Join me below in customizing and adding CSS to the form elements to match the style.
Step 1: Preparing the form for customization
- Click on Create your form, name your form, click Build form and click Proceed.
- Click on the "Preview" tab

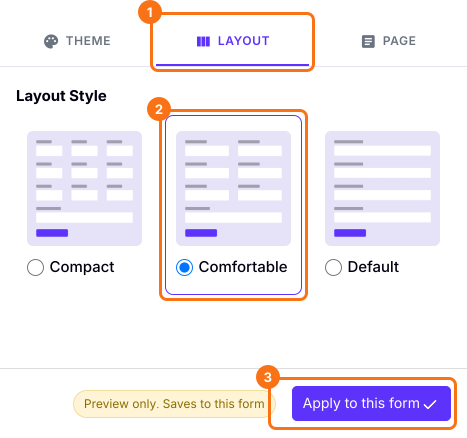
2. Click on the "LAYOUT" tab on the side bar and select "Comfortable" to change the layout to 2-column. Click on "Apply to this form".
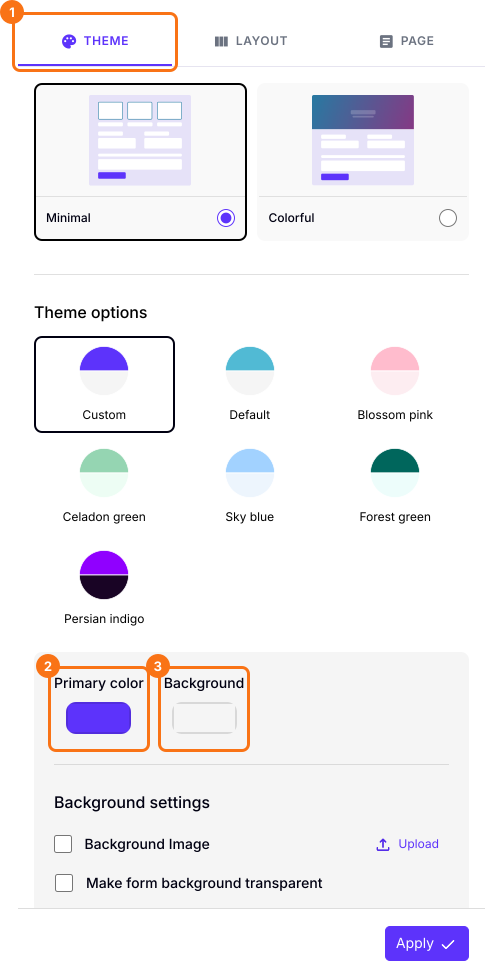
3. On the same side bar, click on the "THEME" tab to change the colors for the form. The "Apply to all forms" button applies the colors to all your forms.
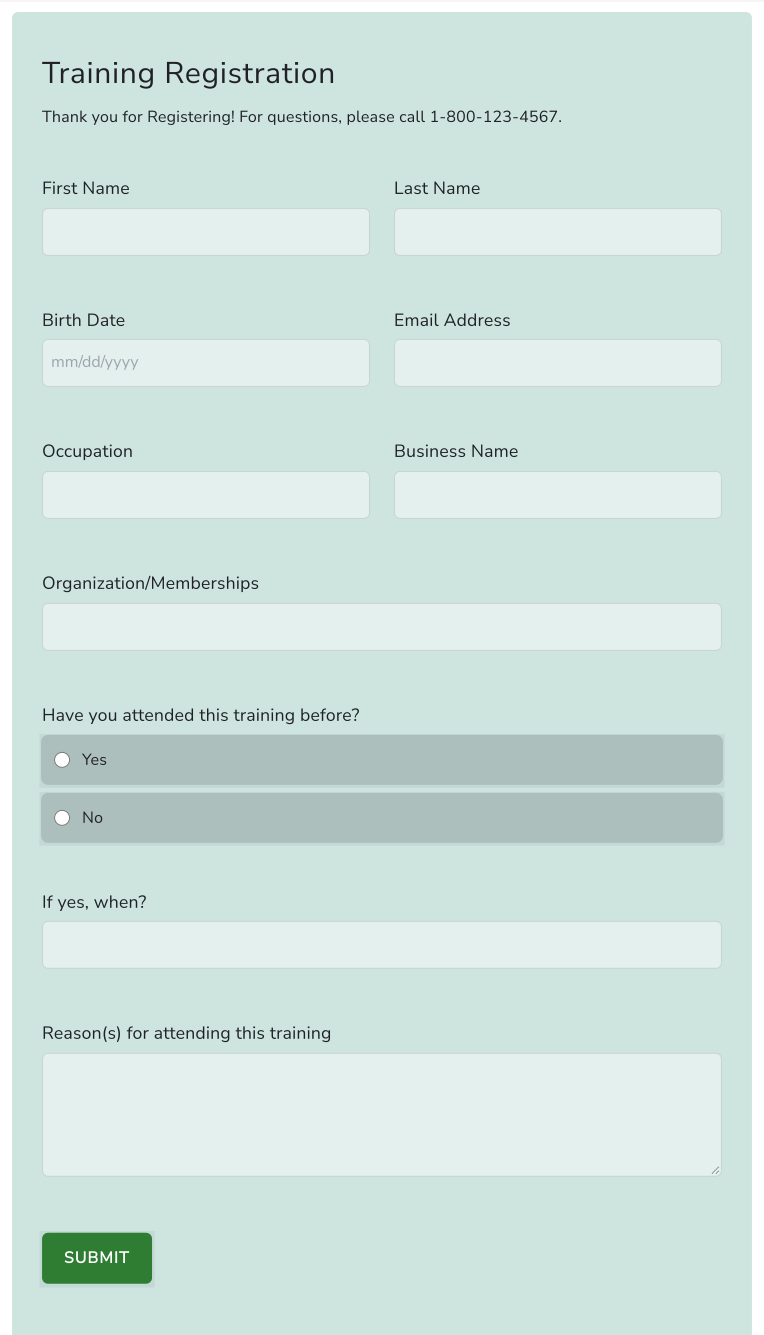
4. Look at your form getting a make-over with Formfacade and compare it with the sample form.
Almost there, right? But wait!
There are some more little things to be adjusted to the title
- Title has to be in Crimson red - Hex code #DC143C or rgb(220,20,60)
- Title needs to have a white bar background and extended from end to end.
- The description has to stay in black. And to be centered.
- Padding needs to be adjusted all over.
5. Let's do "Inspect element" and see what CSS will fit.
6. I made these adjustments in "Inspect element" and arrived at this CSS code below.
.ff-title {
color:#DC143C !important;
padding: 20px !important;
background-color: white;
position: relative;
transform: translateX(-4%);
width: 109%;
}
.ff-description {
padding-top: 20px !important;
align: center !important;
}
.ff-form {
padding: 0px 30px !important;
}
.ff-compose {
padding: 0px !important;
background: none !important
}
.ff-section {
padding-top: 0px !important;
}
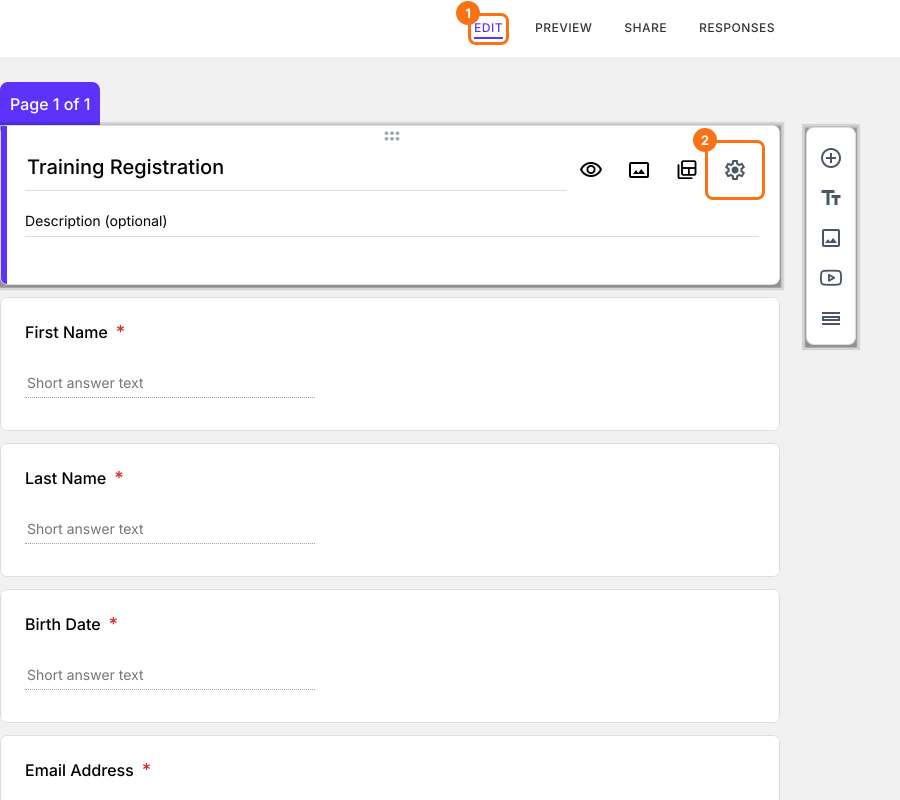
7. Now let me add the code to my form. I click on "EDIT", click on the form title, then on the ⚙️ icon and click on "Advanced" tab to add it in "Custom CSS". Click on "Save".
8. Watch the video below to see how the form is transformed when I add the code one by one.
And, here is the final form. Looks awesome! Isn't it?
How do you like such customization. Show us your designs and write to us at support@formfacade.com.
Bonus!
Here is a table of comparison between what customization are possible with Google Forms and Formfacade.
1. Identify the desired customization that you want for your form/field from this table.
2. Click on the linked article for a detailed step-by-step tutorial to achieve the design you want.
Make your Google Form look great on your website. Happy designing!
| Form | Google Forms | Formfacade |
|---|---|---|
| Layout | Standard one column | Multi-column |
| Background/Theme color | Yes | Yes |
| Button color | No | Yes |
| Form fields | No | Yes |
| Change Font settings | ||
| Font color | ? | No |
| Font style | Yes | Yes |
| Advanced CSS styles | No | Yes |
| Fields | ||
| Change Placeholder Text | No | Yes |
| Appearance (Hidden/Read-only) | No | Yes |
| Change the question name? | No | Yes |
| Pre-fill | Yes | Yes |
| Calculated Fields | No | Yes |
| Advanced customization (formatting text - bold, italics) | No | Yes |
| Conversion Tracking | No | Yes |
| Hotjar integration | No | Yes |
| File upload | Drive, requires sign-in | Yes |
Summary
Google Forms' theme changes the colors and fonts but not the layout or spacing, and your website's CSS can't reach a form in an iframe. With Formfacade, you change the layout and colors and add your own CSS to adjust the rest. Create your form and complete the steps above. If you have any questions, write to support.
Last updated: